Double-Ender Recording: The Ultimate Guide
In the world of remote podcasting and interviews, ensuring high-quality audio can be a challenge.
Key Takeaways:
- Superior audio quality: "Double-ender recording eliminates issues such as lag, distortion, and background noise, resulting in pristine audio quality that rivals studio recordings."
- Enhanced reliability: "Unlike internet-based recordings, which are susceptible to dropouts and interruptions, double-ender recordings are more reliable and resilient."
- Greater flexibility: "With double-ender recording, participants can record their audio at their convenience, eliminating the need for real-time communication and scheduling conflicts."
In the world of remote podcasting and interviews, ensuring high-quality audio can be a challenge. However, there's a technique that professional podcasters swear by: double-ender recording. This method involves recording audio locally on each participant's end, resulting in pristine audio quality and eliminating the issues commonly associated with internet-based recordings, such as lag and poor audio quality. In this comprehensive guide, we'll explore everything you need to know about double-ender recording, including its benefits, how it works, and step-by-step instructions to implement it for your podcast or interviews.
Did you know?
Double-ender recording isn't just reserved for podcasting; it's also commonly used in the film and television industry for remote interviews and voiceovers. By recording audio locally on each end and syncing it during post-production, filmmakers can ensure consistent audio quality, even when working with remote talent.
Benefits of Double-Ender Recording:
Superior Audio Quality:
- By recording audio locally on each participant's end, double-ender recording eliminates issues such as lag, distortion, and background noise, resulting in pristine audio quality that rivals studio recordings.
Enhanced Reliability:
- Unlike internet-based recordings, which are susceptible to dropouts and interruptions, double-ender recordings are more reliable and resilient, ensuring that you capture every word without any technical hiccups.
Greater Flexibility:
- With double-ender recording, participants can record their audio at their convenience, eliminating the need for real-time communication and scheduling conflicts. This flexibility makes it easier to collaborate with guests in different time zones or with busy schedules.
Preparation:
Choose a recording location: Popular options include Zoom, Skype, Riverside.fm, or Squadcast. These platforms let you and your guests record different audio tracks that facilitate the conversation.
Inform guests: Let your guests know that this is a double recording and explain the importance of using high-quality headphones to avoid hearing issues.
Tech Check: Do a quick test run with your guest and make sure all the mics and headphones in your chosen stage are working properly
Equipment:
Microphone: Invest in a good microphone for you and your guests. USB mics are convenient, but XLR mics with an audio interface provide better sound quality.
Headphones: Closed headphones prevent microphone bleed (it picks up your guest’s voice through your mic).
How Double-Ender Recording Works:
Preparation:
- Before the recording session, ensure that all participants have the necessary recording equipment, such as microphones and audio recording software. Coordinate with your guests to establish the recording time and provide any technical guidance they may need.
Recording:
- At the scheduled time, each participant records their audio locally using their preferred recording software. Encourage participants to record in a quiet environment with minimal background noise to ensure optimal audio quality.
File Sharing:
- After recording, participants share their audio files with the host or editor using a file-sharing platform such as Dropbox or Google Drive. Ensure that all files are labeled clearly to avoid confusion during post-production.
Syncing and Editing:
- In post-production, the host or editor syncs the audio files from each participant using reference points such as claps or countdowns. Once synced, the audio can be edited, mixed, and enhanced to create a seamless final product.
Finalization:
- After editing, the final audio file is exported and distributed to your audience through your chosen podcast hosting platform or distribution channels.
Quiet environment:
6 Find a quiet place to record, free of background noise such as traffic or loud equipment.
Sync Point:
7 Set a sync point to sync audio tracks later in editing before recording. Clap your hands together or say "hello" at the beginning of the recording.
Additional Tips:
Record locally: Consider using a separate recording app (such as Audacity or Voice Memos) on your device to take a local backup of your audio tracks in case of an internet connection to the selected platform.
Clear communication: Establish clear communication with your guest throughout the recording session. Avoid talking to each other and allow for natural pauses in the conversation.
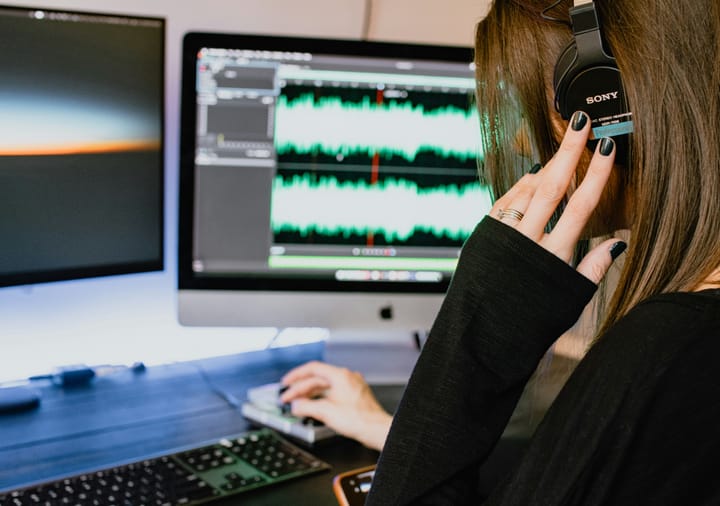
Post-production: Editing software like Audacity or GarageBand allows you to import two audio tracks, align them with a sync point, and edit the recording for clarity and flow
Online Resources:
Riverside.fm:
This comprehensive guide from Riverside.fm goes in-depth into recording a double-ender. It offers practical steps, and platform-specific tips (using Riverside.fm) and highlights the benefits of this style of recording.
Waveroom:
This site from a professional audio production company offers double-ended recordings specifically for podcasts Their focus is on achieving high-quality audio, making it a valuable resource for sound processors.
Podcast Insights:
While they may not have a dedicated article, Podcast Insights is a repository of podcasting information. Search their site under "double-end recording" using the general search bar. You may find helpful articles or discussions in their forum.
Extensions:
Look for this YouTube video titled "Double Ender Podcast Recording: An Easy Way to Record Interviews Remotely". Danny Ozment offers a practical and handy double-taping method, along with valuable tips on guest interaction.
Conclusion:
Double-ender recording offers a simple yet powerful solution for capturing high-quality audio in remote podcasting and interviews. By recording audio locally on each participant's end and syncing it during post-production, you can ensure superior audio quality, reliability, and flexibility. Whether you're a podcaster, filmmaker, or content creator, incorporating double-ender recording into your workflow can elevate the quality of your productions and enhance the listening experience for your audience.
FAQ:
Q: Can I use double-ender recordings for live interviews or podcasts?
A: While double-ender recording is typically used for pre-recorded interviews and podcasts, it's possible to adapt the technique for live broadcasts with careful planning and coordination.
Q: What recording software should I use for double-ender recording?
A: Popular recording software options for double-ender recording include Adobe Audition, Hindenburg Journalist, and Audacity. Each software offers unique features and capabilities to suit different needs and preferences.
Q: How can I ensure consistent audio levels across multiple recordings?
A: Use reference points such as claps or countdowns to sync the audio files from each participant during post-production. Additionally, utilize audio editing tools to adjust levels and ensure uniformity throughout the final product.
Billionviews.ai is a video editor recruiting platform. Discover video editors who can meet your style preferences, budget, and deadlines. Once you post a job, applicants are rated based on their samples. Post your job on Billionviews.ai today for free!
