Crafting Lip-Synced Characters for Social Media Videos
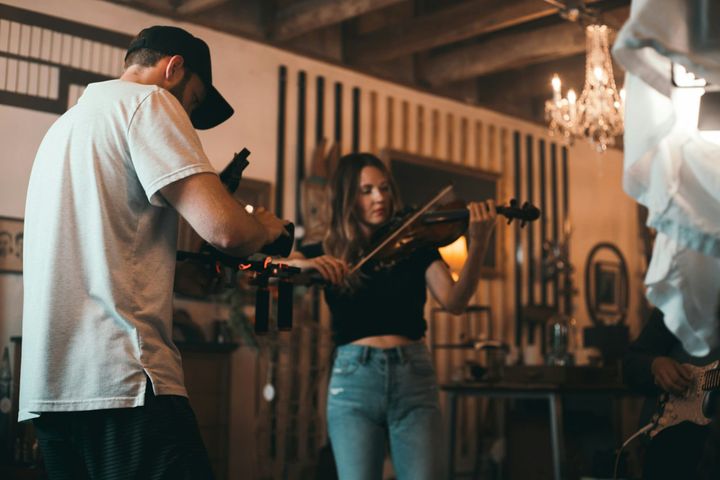
In the dynamic world of social media, lip-synced avatars are becoming a popular and innovative approach to engage people.
Key Takeaways:
- Creating a lip-synced avatar for social media involves utilizing specialized software that animates digital characters in sync with audio.
- This method improves interaction and gives social media content a distinctive, entertaining touch.
- Avatars must have their voice and face motions synchronized perfectly to look genuine and interesting.
In the dynamic world of social media, lip-synced avatars are becoming a popular and innovative approach to engage people.
One fascinating thing to note about this technology is that it often uses advanced algorithms to match spoken words to a character’s lip movements. Want to try creating lip-synced avatars? Here’s how to make one for your social media!
1. Choose the Right Software
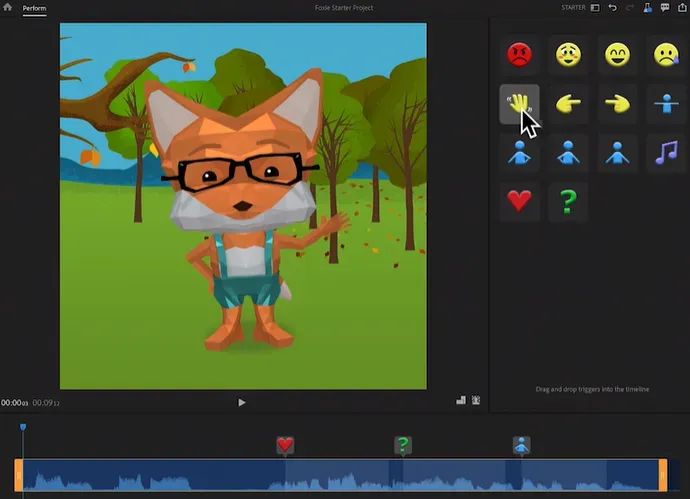
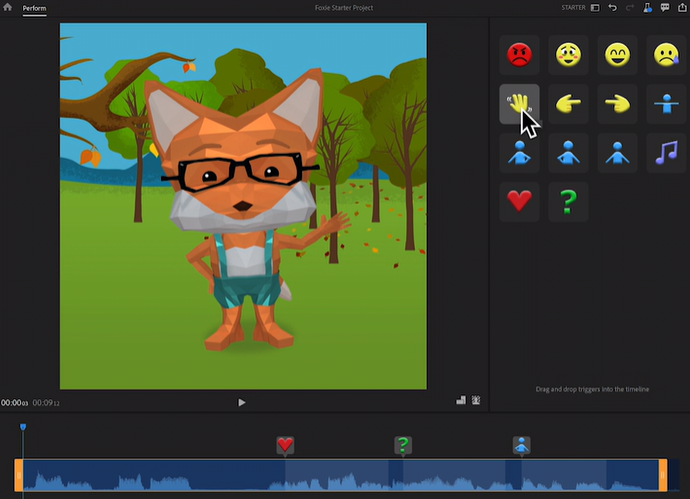
The first step to creating a great lip-synced avatar is, of course, to pick the right software! Popular options are tools like Adobe Character Animator and CrazyTalk Animator. These tools provide various features for character creation and animation, such as the ability to automatically sync lips to music. For instance, users can import a digital character into Adobe Character Animator and sync its mouth motions with recorded or even live audio.
2. Create a Custom Avatar
Customizing or designing your avatar is a crucial step. The character design must reflect the personality you aim to portray through your social media content.
This can be accomplished by creating the character with a graphic design program and then importing it into the animation program. If your content is into fitness, then designing your avatar into a sporty one could be great to engage your audience!
You can create an avatar with Microsoft Designer or Hedra. You can watch this video to create an avatar with Hedra.
3. Recording or Importing Audio
The next step is to record or import the audio that your avatar will lip-sync to. There are now so many AI voice tools that you can use - Elevenlabs, HitPaw, etc.
This could be a script for a promotional video, a humorous dialogue, or any other spoken content. Ensuring clear diction and proper pacing in the audio recording can significantly improve the lip-syncing quality.
4. Choose the Best Lip-Syncing Tool
When it comes to synchronizing an avatar’s lip movements with audio, selecting the right software is crucial. One highly recommended tool for this task is Adobe Character Animator. This software stands out for its ability to automate lip-syncing using its advanced speech recognition algorithm. The program will analyze voice input, whether it is live speech or pre-recorded audio, once users import their digital avatar to flawlessly sync the avatar’s lip movements with the audio.
5. Synchronize Audio with Lip Movements
Your chosen software will analyze the audio file and synchronize the avatar’s lip movements to match the spoken words. Fine-tuning may be required to guarantee that the synchronization seems natural. For example, if you’re preparing a video for a product launch, adjusting the timing might be needed to ensure that the avatar’s lip movements accurately match the product’s key points.
6. Add Expressions and Gestures
Want to make your avatar more lifelike and engaging? Add facial expressions and gestures! This can include head tilts, eyebrow movements, and blinking, to enhance the relatability and realism of the avatar. To give an example, a nodding gesture when highlighting the key benefits of a service or product might be a perfect choice for a social media marketer’s avatar.
7. Export and Share on Social Media
Once your avatar is fully synchronized and animated, the last step is to export the video and share it on your social media platforms. Your avatar can be used for different types of content, such as promo videos, tutorials, and entertainment.
Sounds Complicated? Try HeyGen
Here are 10 steps to create a lip-synced avatar with HeyGen:
- Visit the HeyGen Website
Start by heading over to the HeyGen website. You can explore different subscription plans depending on your needs. The Creator plan, with 180 yearly credits, is recommended for casual users.
- Log in to HeyGen
Once you’ve selected a plan and created an account, log in to your HeyGen dashboard to access the tools.
- Navigate to Video Translation
On the left-hand side of the dashboard, find and click on the "Video Translation" option. This tool allows you to translate videos and synchronize lip movements with the new language.
- Upload Your Video
You can either input a URL (e.g., from YouTube or Google Drive) or upload a video directly from your computer. In this case, choose the "Upload Video" option, then drag and drop the video file you want to translate.
- Create a New Translation
Once your video is uploaded, select the “Create New Translation” option. This tool automatically translates the video’s audio and syncs lip movements to match the translated speech.
- Optional Proofreading for Enterprise Users
If you are an Enterprise subscriber, you have the option to generate a proofread version of the script before finalizing the translation. This step helps ensure higher accuracy in the translated content. Non-Enterprise users can skip this and proceed directly to the translation.
- Choose Target Language(s)
Select the language(s) you want to translate the video into. HeyGen provides a list of available target languages. You can also keep the original language and auto-detect the number of speakers if needed.
- Upload Caption File for Precision (Optional)
If you have an existing caption file, you can upload it for a more precise translation. This feature is optional but can help improve the accuracy of the subtitles and lip-sync.
- Confirm and Submit for Translation
After selecting your language(s) and adjusting other settings, confirm your submission. A window will pop up showing the number of credits that will be used for the translation process. Once confirmed, click “Submit for Translation.”
- Download and Review the Translated Video
After the translation is complete, click on the video to view the results. The new video will have the original voice translated and the lip movements synchronized to the new language. You can then download the video to your computer.
Alternative to HeyGen: DupDub
To create a lip-synced avatar using DupDub, here’s a more detailed step-by-step process:
1. Sign Up and Log In
Visit the DupDub website and create an account. Once registered, log in to access the DupDub dashboard.
2. Choose or Upload Your Avatar
In the dashboard, navigate to the AI Avatar section. You can either select a pre-made avatar from DupDub’s library or upload a still image of a person that you want to turn into an AI avatar. DubDub will process the image and prepare it for lip-syncing.
3. Input Text or Upload Voice
After selecting the avatar, you'll be prompted to choose how you want to create the voiceover:
Text Input: Type the script or text that you want the avatar to speak.
Audio Upload: Alternatively, you can upload your own recorded voice file (e.g., MP3 or WAV) to sync with the avatar.
4. Customize Voice and Style
Next, customize the voiceover:
Select Voice: DupDub offers hundreds of human-like voices in over 70 languages and accents. Choose the one that fits your content.
Adjust Emotions and Tone: You can adjust the mood, style, and emotional tone (e.g., calm, excited) to match the context of your video.
Fine-tune Voice Parameters: Adjust parameters such as pitch, speed, and rhythm to make the speech sound as natural as possible.
5. Lip Sync Generation
Once everything is set, click on the Generate button. DubDub’s AI will sync the avatar’s lip movements to match the speech from the text or uploaded audio, creating a realistic lip-sync effect.
6. Preview and Export
After the lip-sync video is generated, you can preview it to ensure the lip movements align correctly with the speech.
If satisfied, click Export to save your video in formats like MP4 for video or SRT for subtitles. You can also download the voiceover as an audio file in MP3 format.
7. Download and Use
Once exported, the file will be ready to use in your projects. You can share the lip-synced avatar video directly on platforms like YouTube or integrate it into other video content.
DupDub’s intuitive interface makes it easy for creators to produce highly realistic lip-synced avatars with just a few steps.
Conclusion
To sum up, creating a lip-synced avatar for your social media is a creative and fun approach to engaging your audience. So if you want to create unique and entertaining content that sticks out on social media, doing the steps above might be worth a try.